Friday, August 23, 2019

3 Years Later....

I didn't know if I'd ever have a reason to write posts for this blog ever again... But it seems the time has come!  If you don't know me personally, or have any idea what I've been doing during my 3-year home-remodeling hiatus...you can read about it HERE in (too much) detail.  

For those of you who want the short version... In 2016, my husband and I quit our day jobs, sold our newly-remodeled river house, both of our cars and 95% of our belongings.  Then we bought a used minivan and whatever stuff we could fit in the van (including our 100-pound pup) is all that we kept.  It was basically just clothes, kitchenware, exercise equipment and golf clubs...because, priorities.  We didn't haul a trailer, there was no rooftop carrier and we didn't rent a storage unit...we said goodbye to it all, and then drove 2,800 miles from Seattle to our favorite little town in Nayarit, Mexico to start our new, much simpler lives as semi-retired beach bums.  Why, you ask?  Well, why not.  Life is much too short to wait until your sunset years to start living the life you want to live right now....  

We've been legal, full-time residents here for over 3 years and have bounced around to a few different houses, but we've been without a real "home" since we sold our house up North and relocated South of the Border.  

But recently, we did a big thing.  We bought a ready-to-build, corner lot in La Cruz de Huanacaxtle just three blocks from the town plaza, marina and the beach and we're building what could very well be our "forever home" this winter.  (That is unless Ty has another early mid-life crisis and we up and move again... knock on wood.) 

The view from the outside... The perimeter walls will double as the exterior house walls to maximize the square footage of the house.  


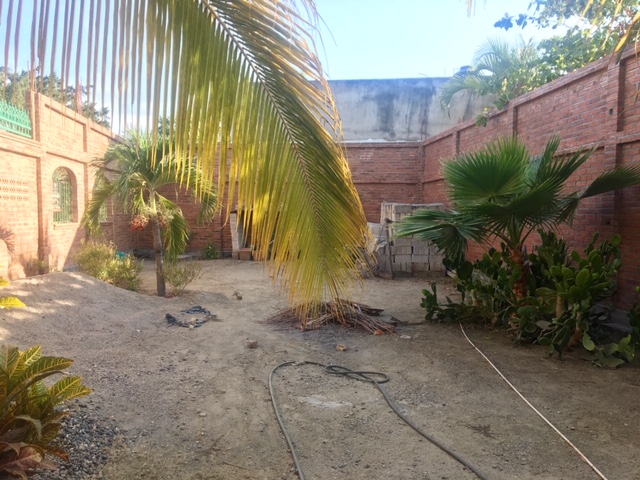
The interior... Nothing but dirt and plants at the moment.


The future kitchen.... 


All of the plants have to be dug up and relocated to other places on the property, and we're also giving a lot of them away because they're won't be enough room for them all. 


The house is going to be L-shaped inside the rectangular-shaped lot.  It's going to have 2-bedrooms, 2.5 bathrooms, 2 stories with a rooftop terrace and a separate 1-bedroom apartment above the garage that we plan to rent out to tourists in the winter months to earn some extra pesos.  It'll also have a small yard with a dipping pool and (supposedly) an ocean view from the roof.  (I'll believe it when I see it...) 

I'll probably post some general construction updates on here and on my Mexico blog, but I'll save the more do-it-yourself and project-specific posts just for this one.  Obviously, it's gonna be a big job done by a full-blown construction crew over 3-4 months, so the real fun (for me) won't come until there are actually some walls up... This house will be a lot different for me, since I'm used to tearing houses apart and then putting them back together.  This time, I get to design it from the ground up and I'll have a blank canvas to play with when the construction is done!  So, stay tuned!  


Tuesday, March 15, 2016

Moving....Again.

Ty has this really frustrating habit where he buys the worst house he can find, asks me to spend months and months perfecting every square inch of it to my liking, and then as soon as I can finally put my feet up...he gets it in his head that it's time to move again.  Yikes.  I'm just gonna stop remodeling houses....

This blog is mostly about our Lil Red House, that I spent 7 back-breaking months remodeling (while going to school full-time to learn how to be a badass bootcamp instructor) that we no longer own.  We have since sold it, bought another fixer-upper in a different state, totally remodeled the new house, and are getting ready to move...AGAIN!

As sooooooon as I was done remodeling the Lil Red House, Ty was offered a 'better' job in another state (in fact, it was the exact same day as our house-warming party.)  He accepted the position and moved North before Christmas a couple years ago, while I stayed behind to finish school.  That March, as expected, he found the nastiest house he could and convinced me we needed to buy it.  I begrudgingly agreed to let him buy "The River Terd," as I started calling it.  It was a funky 1970's house that basically needed to be gutted.  Here we go again!

So, for the next 3 months... I went to school full-time Monday through Thursday, drove 3 hours North on Friday mornings to work on the new house...and drove home on Sunday night to get ready for the next week of school.  (All while maintaining a 4.0 GPA, mind you!!)  I wore workout pants during the week and a tool belt on the weekends.  I was frickin tired.  We sold the Lil Red House and I moved up officially in June, and that's when the real fun began.  We were legitimately living in a full-blown construction zone.  We had plywood subfloors, no furniture and no working stove for months and MONTHS.  I knew my way around Home Depot better than the employees did, my hair dryer could be found next to my cordless drill, we were living out of boxes...and I sported paint-stained clothes 7 days per week.  I continued working on the house night and day while also completing a 3-month, 250-hour internship to finish my degree.  Did I mention I was tired?


Fast forward to 15 months later....the house was FINALLY finished.  Absolutely everything in the house had to be redone.  The list of upgrades and improvements we made is endless, and almost every project was tedious and exhausting and never-ending.  Amazingly, our River Terd goes on the market tomorrow, and it all sorta feels like deja vu.

Long story short... I thought I should finally post some before, during and after pictures.  Enjoy.

The kitchen:


The view of the kitchen from the dining room:


The fireplace/living room:


The half bathroom w/faux granite counters:


The main bathroom:


Paper bag flooring strikes again!!!


More paper bag flooring....Stairs NOT recommended.  Ugh.  (Looks awesome, but took forrrrrevvver.)


The exterior:


So, you get the point by now.... It was a TON of work and I can't believe we're moving...again.


Monday, June 1, 2015

Fixer Upper #2!

Even though I haven't added to this blog in a year and a half (holy crap, time flies)... I still have an alarming number of page views every day.  Amazingly, some of my posts have been re-pinned hundreds and hundreds of times.  Apparently that means I need to keep blogging about all my handy-dandy Martha Stewart-ness!

Since finishing the remodel of my Lil Red House... I have graduated college, changed careers, (sadly) moved to another state, and completely remodeled yet another major fixer upper.  Our newest house was an even BIGGER project than our last house - but we love the way it turned out and are really starting to settle into our new digs.  It doesn't hurt that the funky cottage we bought is on a half acre of land with a river in our backyard.  I wasn't super happy about leaving our old house and moving here in the first place, but I have to admit...it's pretty amazeballs.  

Our new house was a 1970's turd ball when we bought it.  It was dirty, had a weird layout and was last updated before I was born.  We only bought the property because of the land it was on, and the potential it had to be a really cool place to live and entertain.  I was adamant that I didn't want to tackle another major remodel so soon after being forced to sell our last house...but that's just the way it worked out.  All of the so-called "turn-key" houses we looked at were boring, cookie-cutter crap and we couldn't see ourselves forking over a bunch of cash for a vanilla house we'd want to change anyway.  So, true to form, we bought the worst house on the street for a smoking deal and proceeded to start swinging the sledge hammer all willy-nilly like. 

The only thing we kept in our house were the walls and the interior doors.  Absolutely everything else had to go... The yellow light switches, brass light fixtures, brass door knobs, electric baseboard heaters, baby blue wood paneling, rusty aluminum windows, faux-marble Formica, the entire white-washed kitchen, every ounce of poorly-painted trim and every square foot of stained flooring HAD TO GO.  Even the exterior needed a major overhaul.

I made sure to take before, during and after pictures during our grueling 6-month remodel with the intent of posting them all here... So, I guess I better get to work! 

Stay tuned to see how THIS.....


Turned into this....


Saturday, September 21, 2013

Dining Room Reveal!

After I totally destroyed my dining room, I quickly got to work fixing it back up... I explained why I had to tear down this ugly cabinet in my last post... But unfortunately, it didn't turn out as expected and I ended up changing it yet again.  I thought if I whacked the top half of the cabinet off I could turn the bottom half into a cool, functional storage area.  This is what I was left with....


But I still hated it.  Damn.  Now the cabinet jutted too far out into the living room.  It just looked like an oddly placed piece of furniture.  Like when you walk into a business and the front desk is blocking you from entering.  And if this wasn't attached to the wall I would never in a million years put it there.  Grrrrrr.  So, I decided to break some more stuff...and to shorten it from three cabinets to two.  Like this... 


This task proved harder than taking off the entire top.  And it nearly broke my nose.  Like, I seriously almost drove myself to the emergency room.  It's a long story.  Moving on.

Because the top and several other parts of the cabinet were made of long, solid pieces of wood I literally had to CHOP the third cabinet off.  I pried the quarter round trim off first to make sure that there was even hardwood underneath...which there was...so I got to work.

I was able to get the back, side and shelf pieces off no problem... But the top and bottom were connected to the rest of the cabinet, and I ended up using three types of saws to get it off.  It was a huge pain and took forever.  But, as always, I won!


I cut the quarter round trim to size and reused it... And I also reused the backing to recover the top and side since they were totally mangled during the demolition.  


What a mess...


Next, I trimmed around the top and down the sides to disguise the fact that it used to be a totally different cabinet.  Never mind the dumbbells.  What the heck did I use Elmer's glue for?  It's all a blur.... 


Then I primered, caulked and painted the crap out of it.  And I added contact paper to the shelves, because there was NO WAY I was gonna paint the inside of it too.  Real wood soaks up paint like the desert soaks up water.  It took two coats of primer and 2-3 coats of paint to cover this bad boy... 


Finally, I reused the tacky gold hinges by spray painting them oil-rubbed bronze and splurged for pretty, faux crystal, vintage-looking knobs. 


Before I could paint the dining room, I had to repair the bare sheetrock where the cabinet had been.... Which meant spackling, patching, texturing, etc.  And I also had to patch, primer and paint the ceiling...and sand, stain and poly the bare hardwood floor where the cabinet had been.  Compared to the rest of this project, these were the easiest tasks....

Now the best part....after pictures!!!  I painted the walls a dark grey and added shelves I had lying around above the cabinet.  


They vinyl chandelier and "Happy Halloween" sign are from Welcome Home Vinyl which is my mama's vinyl business!  I traded her a haircut for it (another one of my random talents) but you can purchase one (or many other super cute items) from her website!  


In total, I only spent about 80 bucks on the entire dining room because I reused a lot of materials and other stuff I had on hand.  Next up...the living room reveal.