Saturday, September 21, 2013

Dining Room Reveal!

After I totally destroyed my dining room, I quickly got to work fixing it back up... I explained why I had to tear down this ugly cabinet in my last post... But unfortunately, it didn't turn out as expected and I ended up changing it yet again.  I thought if I whacked the top half of the cabinet off I could turn the bottom half into a cool, functional storage area.  This is what I was left with....


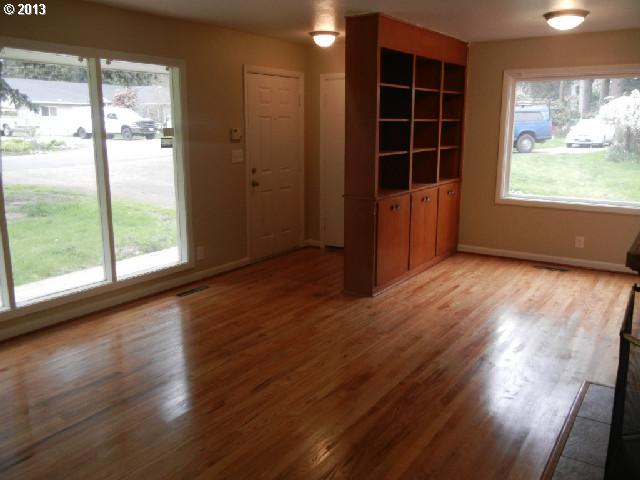
But I still hated it.  Damn.  Now the cabinet jutted too far out into the living room.  It just looked like an oddly placed piece of furniture.  Like when you walk into a business and the front desk is blocking you from entering.  And if this wasn't attached to the wall I would never in a million years put it there.  Grrrrrr.  So, I decided to break some more stuff...and to shorten it from three cabinets to two.  Like this... 


This task proved harder than taking off the entire top.  And it nearly broke my nose.  Like, I seriously almost drove myself to the emergency room.  It's a long story.  Moving on.

Because the top and several other parts of the cabinet were made of long, solid pieces of wood I literally had to CHOP the third cabinet off.  I pried the quarter round trim off first to make sure that there was even hardwood underneath...which there was...so I got to work.

I was able to get the back, side and shelf pieces off no problem... But the top and bottom were connected to the rest of the cabinet, and I ended up using three types of saws to get it off.  It was a huge pain and took forever.  But, as always, I won!


I cut the quarter round trim to size and reused it... And I also reused the backing to recover the top and side since they were totally mangled during the demolition.  


What a mess...


Next, I trimmed around the top and down the sides to disguise the fact that it used to be a totally different cabinet.  Never mind the dumbbells.  What the heck did I use Elmer's glue for?  It's all a blur.... 


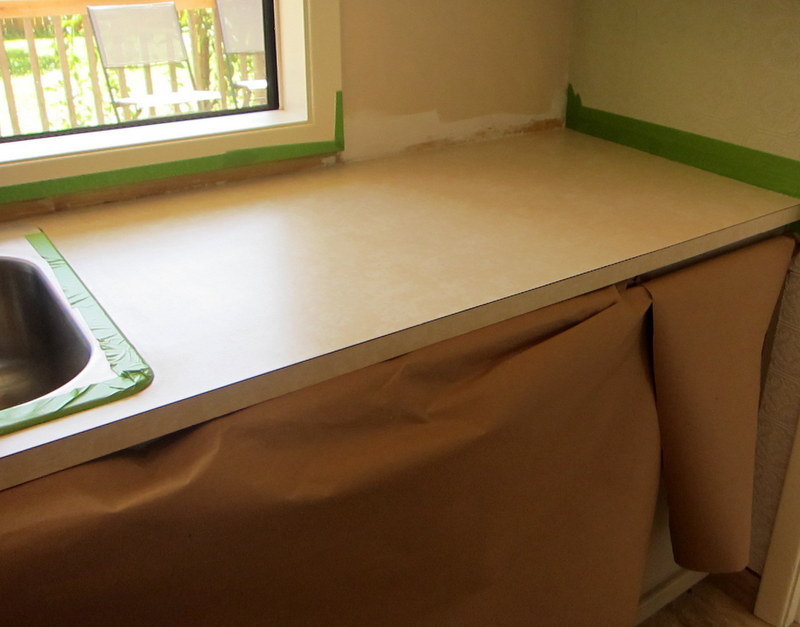
Then I primered, caulked and painted the crap out of it.  And I added contact paper to the shelves, because there was NO WAY I was gonna paint the inside of it too.  Real wood soaks up paint like the desert soaks up water.  It took two coats of primer and 2-3 coats of paint to cover this bad boy... 


Finally, I reused the tacky gold hinges by spray painting them oil-rubbed bronze and splurged for pretty, faux crystal, vintage-looking knobs. 


Before I could paint the dining room, I had to repair the bare sheetrock where the cabinet had been.... Which meant spackling, patching, texturing, etc.  And I also had to patch, primer and paint the ceiling...and sand, stain and poly the bare hardwood floor where the cabinet had been.  Compared to the rest of this project, these were the easiest tasks....

Now the best part....after pictures!!!  I painted the walls a dark grey and added shelves I had lying around above the cabinet.  


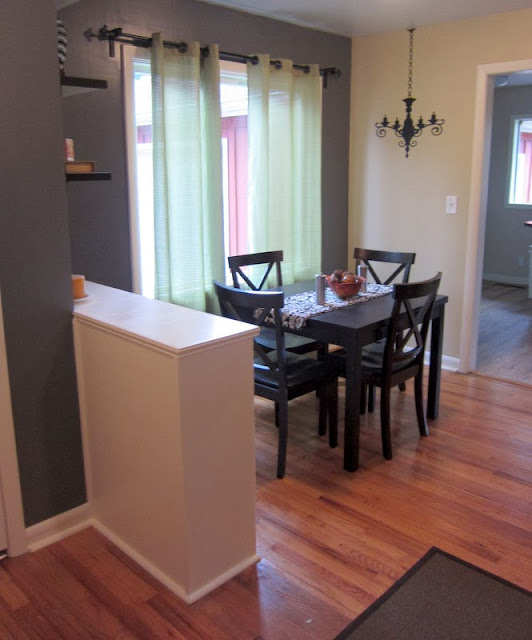
They vinyl chandelier and "Happy Halloween" sign are from Welcome Home Vinyl which is my mama's vinyl business!  I traded her a haircut for it (another one of my random talents) but you can purchase one (or many other super cute items) from her website!  


In total, I only spent about 80 bucks on the entire dining room because I reused a lot of materials and other stuff I had on hand.  Next up...the living room reveal. 


Friday, September 20, 2013

Demolition Looks Good On Me

This is my Dining Room Makeover Part One...and this entire post will be about breaking stuff.  As much as I like re-vamping stuff, I might like breaking it even more.  It must be the tomboy in me, but I get a little giddy whenever a sledge hammer is involved... 

This monstrosity has bugged me since we first toured the house.  And silly me thought it would be "one of the first projects I tackle."  But here I am, four months later, and it's still lurking in the corner.  Within the first couple of days of owning this fixer-upper, both the kitchen and bathroom were (accidentally) gutted.  Ooooops.  A functioning shower is more important than an eyesore...or so I'm told.  So, this beast got put on the back-burner. 


The cabinet is bulky and awkward and makes the room feel smaller than it is.  I knew it had to be torn down, but I was concerned about the condition of the floor underneath.  Since the floors are the original hardwoods, I was worried they'd be a different color since they've never seen wear or tear or sunlight.  And refinishing the floors isn't in our budget right now... What to do, what to do?  Light bulb!  I had the idea to whack the top shelving portion off and turn the lower cabinets into a bar/buffet/storage thingy.  That should open up the space without having to deal with the floors... 

My project to-do list is still a mile long and several projects are way more important than tackling this one....buuuutttt....I accidentally tore it down last week.  Hear me out!  We bought a new, L-shaped couch and it's pretty big compared to our smaller living/dining room.  It looks fantastic and fits the room nicely, but it made the space feel even smaller with the two large pieces competing against each other.  

After spending two and a half hours assembling the massive couch by myself (kill me) I took one look at the cabinet and said, "Yup, it's time for you to go."  I have a problem with claustrophobia and I felt like the walls were closing in on me.  And then I proceeded to gather my sledge hammer, crow bar and hammer...and I went to town.

Now, let me say this... This thing isn't made of MDF or some other type of lightweight wannabe "wood."  It was made completely out of solid hardwood...and it was built really, REALLY well.  The saying, "They don't make things like they used to"...means that they used to build things as if a hurricane were coming.  Seriously, if a tornado hit my house this giant would be the only thing left standing.  Kudos, 1950's...kudos.  

After I got the backing off, I stood back and thought... "Hmm, maybe I can just turn it into open shelving.  That might not be as bad."  And then I reminded myself how much I HATE to dust and went back to smashing stuff....


Because of the way it was constructed it was easier for me to DE-construct it, so to speak.  Basically, I broke it down in reverse order.  So, I took the backing off first, and that made the shelves easier to knock out...and then the front trim and so on.  It was back-breaking work and I was sweating my FACE off for over an hour.  I applaud the craftsman who built that sucker... I'm a lot stronger than your average 28-year old girl, and it gave me a mega workout.  My back and shoulder muscles were actually sore the next day from swinging my sledge hammer around all evening....   

Finally, the shelves were gone and all that was left was the soffet at the top.  This is when I had to do a little head-scratching.  I tried swinging at it with the sledge hammer, but it was too high for me to get enough gusto behind it....I could barely reach it, let alone beat the crap out of it.  Then I tried to stand on a step ladder but the weight of the sledge hammer nearly flung me off of it...so, that wasn't going to work.  Hmmm...what else?  

For about a millisecond I considered calling my dad for help, but quickly dismissed the idea...because I am Superwoman (which translates to: crazy stubborn/determined and too proud to ask for help.)  I know!  I'll put the ax end of the sledge hammer (yes, it's double-sided...as if this wasn't dangerous enough) inside the hollow soffet and hang on it with all my body weight until it comes down.  

CAUTION:  DON'T TRY THIS AT HOME!  I was pretty nervous about this part... I was worried about the soffet coming down on my head or my puppy or it damaging my nearby dining table...because it was one long, solid piece of wood, the only way it was coming down was as one piece too.  So I carefully inched it off the ceiling little by little and BAM!  It landed perfectly... PHEW.  


This was quite the undertaking all by myself and I easily could have been hurt or caused damage to my house.  Several times I thought, "Well, crap.  How am I gonna do that??"  But I kept wailing on it and got it done...and it felt GOOOOOD to get that thing outta my house!  I really wish I had someone here taking photos during the mayhem... 


Next up... The re-vamping!  I have to repair the sheetrock and ceiling first, but then I'll get to work on the cabinet.  I plan to paint what's left of the cabinet white to match my baseboards and trim and then do something funky on the top.  Maybe stencil it...or vinyl it...or hand-paint something.  I don't know yet.  But watch for an update soon!  


Monday, September 2, 2013

Faux Granite Counters - Kitchen

This is my second faux granite counter top tutorial so it's not going to be nearly as in-depth as the first one...this is mostly just gonna be photos.  But, if you're interested in the whole process, check out my bathroom counter post too!  It's my most popular post to date... 

I loved the whole process and outcome of my faux granite bathroom counter so much, so I was happy to do it again in the kitchen.  The counters were an ugly, boring cream-colored Formica...and since I have a LOT of counter space I was stoked I could redo them all for a measly 60 bucks.  

I bought another Giani Granite Kit, but this time in Bombay Black.  I had already repainted the drab oak cabinets a light gray-ish/taupe color, and the rest of the colors in the kitchen were pretty light too, so I wanted some contrast.  I was a little nervous about going so dark at first, but I'm totally glad I took the plunge.... The counters are so gorgeous in person and for about a week afterwards I just kept walking into the kitchen to stare at them.  That's normal, right?

Prepping... I used leftover contractor's paper from my paper bag floors to protect my freshly-painted cabinets.  And I used FrogTape to protect some of the walls, the sink and the window trim...but since I was planning to add a tile blacksplash like I did in the bathroom, I didn't have to be careful everywhere.  Thank goodness, because I'm a messy do-it-yourself-er... 


Before I could primer the counters, I had to fill a couple of holes in the Formica... Giani recommends using sandable/paintable wood patch.  All I had to do was smoosh (yes, it's a word) some wood patch in my hands to warm it up, spread it on the holes with a puddy knife and let it dry.  I think it took an hour or so...and then I just sanded it smooth and level with the rest of the counter.  Easy.  


Primered counters.... These photos feel very sneaky.  I cropped out other parts of my kitchen that you are not allowed to see yet!


During sponging.  I know it looks like a really bad kid's art project at this point, but just keep going!  You won't regret it.... 


Okay, okay... I guess you're getting a sneak peak of my top-secret kitchen shelving anyway....  Apparently I forgot to take a picture of the whole kitchen in all its faux granite glory (I suck at this), so I'll do that later (after I clean it!) and add a photo of all the counters on here...


Ahhhh.... I love how shiny they turned out.  They even FEEL real... 


I also used black caulk around the stove and along the walls to give it a really seamless look.  Notice the textured wallpaper...post coming soon!


I couldn't be happier with how the counters came out... They look stunning in person and no one can believe that they're painted.  They are super glossy and multi-dimensional and expensive looking and I LOVE them.  


Gotta go...another DIY project awaits me.